Vembu BDR Suite » Vembu Backup for Microsoft Windows » Vembu Client for Windows Image Backup (Optional) » Configure Windows Image Backup » Step 2: Drive Selection
Step 2: Drive Selection
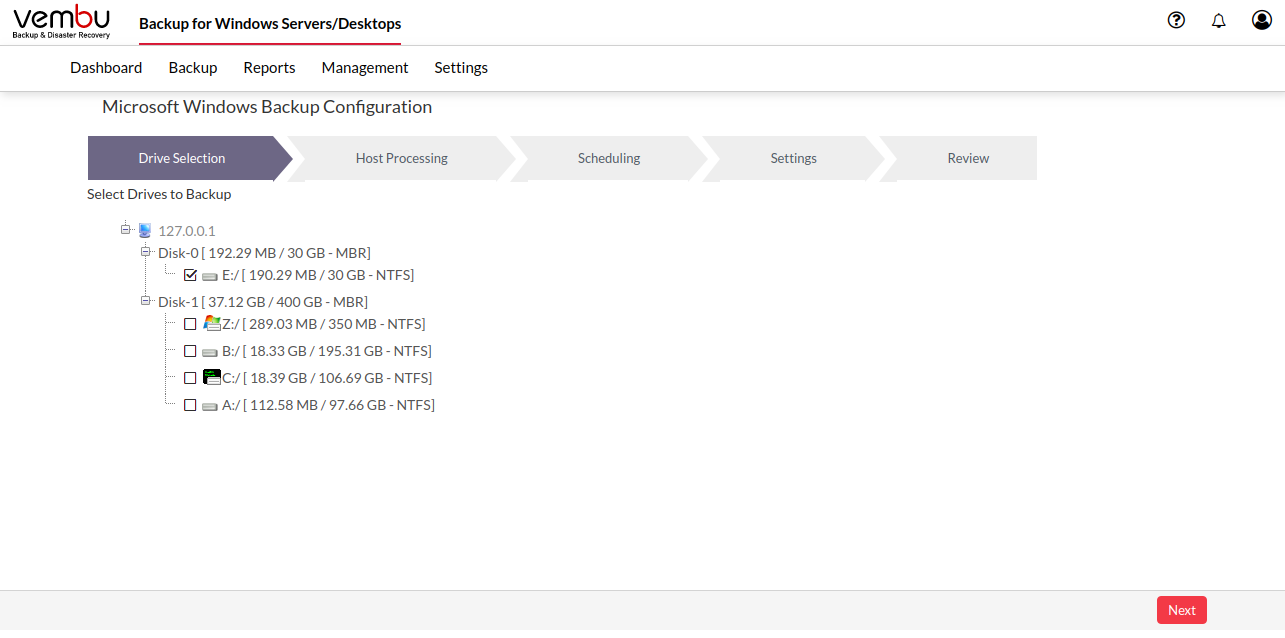
Step 2: Choose Drive(s)
- From the selected host, the disks and drives will be displayed with its available space, full space and the type of disk. You can select the drives from the disk to backup. The drives(Volumes) that are already backed up will be greyed out and is not eligible for backup.
- If you have chosen drives from different disks for backup, the backup will progress in ascending order of disks. For Example: In a 3 disk setup, the backup progress will be in the following order: Drives from Disk 0 will be backed up first, followed by drives from Disk 1 which is then concluded by drives from Disk 2.
- You can choose the drives to be backed up by selecting the checkboxes.
Mount Point
- ImageBackup Client assigns a mount point to the volumes that do not have volume Mount point or drive letter assigned. This is required as the volume without mount point cannot be scheduled for incremental backup. The Driver letter will be applied automatically on refreshing the page. Click OK from the pop-up window and click Next to proceed with the backup process.
If you are configuring backup without mount point, incremental backup will not be done for drives without a mount point |


1) If the volume has already been configured for backup. 2) Disk is ReFS/FAT/exFAT formatted. 3) If the volume is compressed using NTFS Compression. 4) If the Volume is NTFS folder mounted.
|