Settings
Settings
The Settings tab of the Vembu BDR360 Server console holds the Email Settings and the Connectwise Settings under it.
- Email Settings
- Connectwise Settings
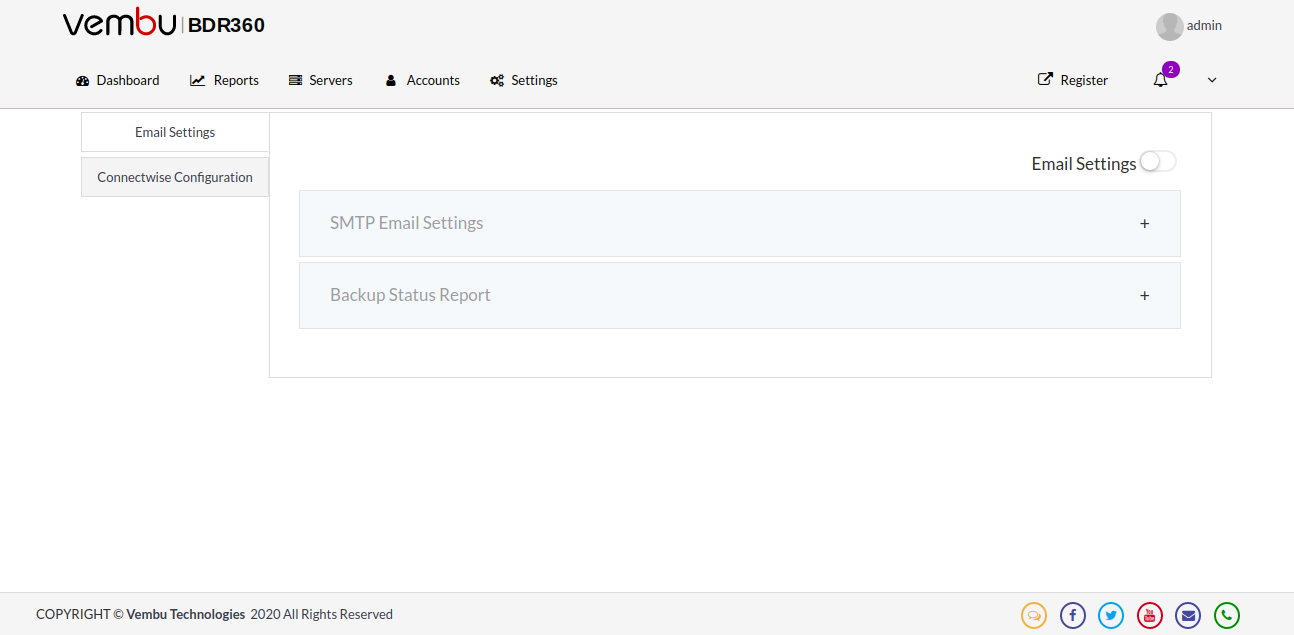
Email Settings
Under the Email Settings, you get to configure the following settings:
- SMTP Email Settings
- Backup Status Report
SMTP Email Settings
For triggering an email from the software, it is necessary to enable the SMTP settings, this section gives you the step by step explanation of configuring the SMTP settings.
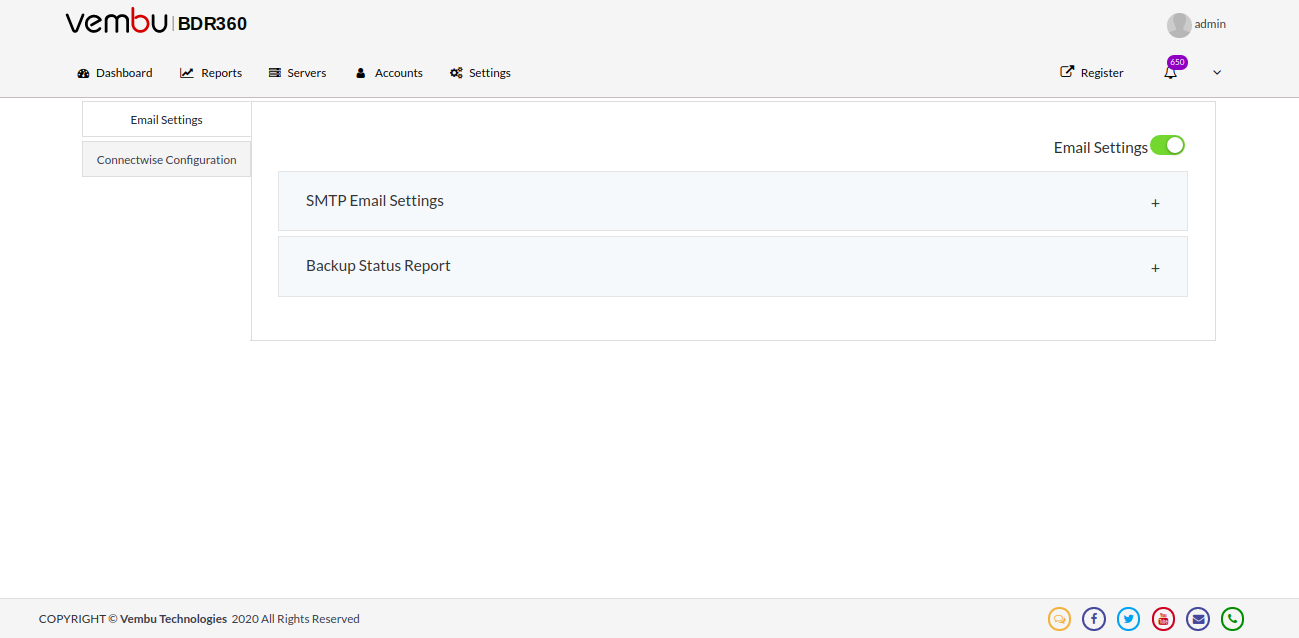
- Enable the Email Settings option before configuring the SMTP Email settings.
- Click the + option near the SMTP Email Settings option.
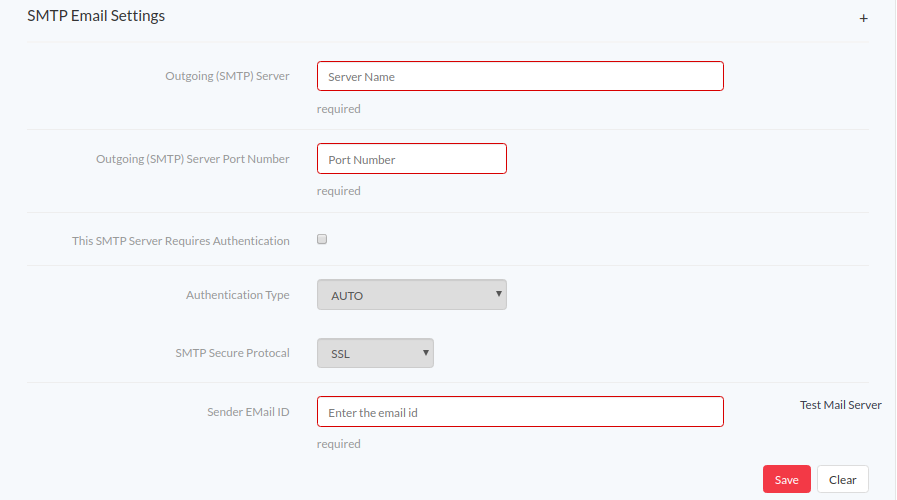
- You will be asked to provide the following details for SMTP Configuration:
- Outgoing SMTP Server
- Outgoing SMTP Server Port Number
- SMTP Server Authentication - if required provide credentials of the SMTP server
- Authentication Type - the listed types are Auto, Plain, Login
- SMTP Secure Protocol -such as None, SSL, TSL
- Sender Email ID
- Enter the sender’s email address and test its connectivity by clicking on the Test Mail Server option.
- Once you click on the test mail server option you will see a popup asking for Recipient’s Email ID- enter the email address of the receiver to whom the mail should be sent and click on the Send Test Mail button.
- If the entered recipient’s mail id is correct a mail will be delivered to the added recipient, this ensures the configured SMTP settings are correct and click Save to save the settings.
Backup Status Report
This option allows you to send the entire backup status reports to a recipient via email.
- Select the Settings tab and expand the Backup Status Reports.
- To enable this option click on the check-box and configure the following details:
- Global Recipient(s) EMail - enter the recipient’s email address
- Period - Select a period from Daily/Weekly/Monthly on which you wish to trigger the mail.
- Next Report time - The next report time will be displayed based on the period set.
- Click Save and proceed with the settings.

Connectwise Configuration
Vembu along with Connectwise makes your workflow simple and effective. Connectwise is a PSA tool that allows automatic service ticket generation and billing management.
- By integrating Vembu BDR360 Server to Connectwise, tickets can be generated for various backup-reports, thereby automating the ticket-creation process.
- Billing-process can also be automated, where Vembu BDR360 Server will create and update bills based on backup size.
Initial Connectwise Setup
Before integrating Vembu BDR360 Server to your Connectwise manage account, make sure to follow the below steps on your Connectwise account:
Step 1: Ensure that your customers are already added to your Connectwise account as companies. The reason behind this is that these companies must be selected during ticket creation or billing while configuring the Connectwise integration with Vembu BDR360 Server settings.
Step 2: While enabling Connectwise-ticketing in Vembu BDR360 Server, the service board under which tickets are to be created- needs to be specified. Hence create service boards as needed.
Step 3: To enable Connectwise-Billing in Vembu BDR360 Server, Connectwise agreements need to be specified.
- Create products as per the requirement with the following specifications:
- Category: Managed Services
- Product Type: Software
- Product class: Service Unit
- Price: in $ (USD)
Based on product usage, the respective unit price will be added. The billing amount can be calculated depending on the unit price. |
- Create agreements (with the End date set to "No End Date") in your Connectwise account. Note that agreements must be mapped to respective companies as needed.
- After saving the agreement, add the product to the Agreement as additions. Use the following specifications while creating agreement:
- Agreement Type: Managed Services
Settings - Vembu BDR360 Server
Select the Settings tab in the Vembu BDR30 Server and click the Connectwise Configuration, enable the Connectwise Integration option using the toggle button on top-right corner.
- Connectwise Authentication
- Ticketing Defaults
- Billing Plan
- Connectwise Company
Connectwise Authentication
To configure the Connectwise Settings it is necessary to authenticate the settings:
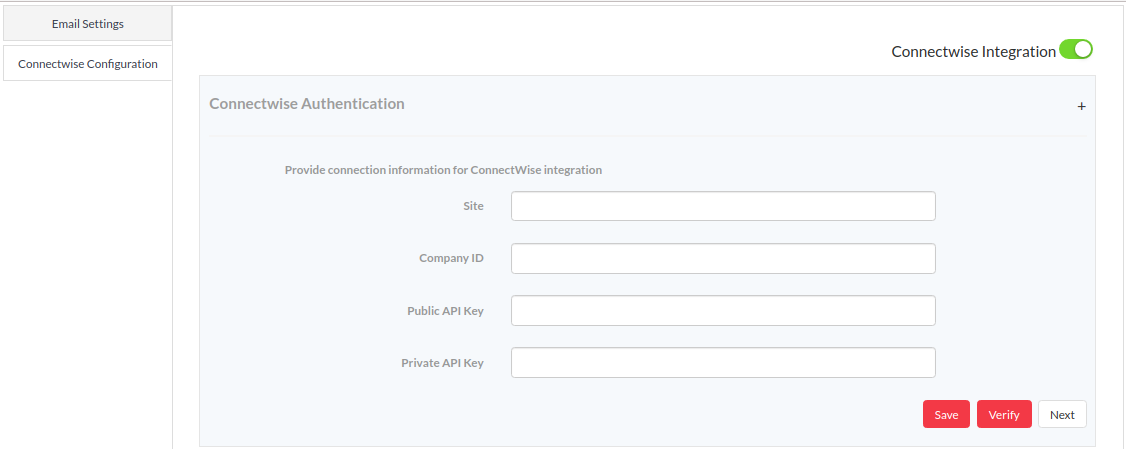
- Click the Connectwise Authentication settings and enter the Connectwise credentials for authentication.
- Enter the Site Name, Company ID, Public API Key, and Private API Key. Click Verify and once verified hit Save.
- Click Next to proceed with ticketing defaults.
Make sure you enter the host-name of the site alone in Site Name section [Host name of Connectwise site] for example 'test.connectwise.com'. For Connectwise-cloud edition, "api-" must be prefixed to the hostname, however for a premise installation, "api-" should not be prefixed |
You should enable either the Ticketing Defaults or the Billing plan feature. At least one Connectwise feature must be selected or you can select both the options. If no option is selected, you will be prompted with the alert message stating "Please select at least one ConnectWise feature". |
Ticketing Defaults
Ticketing defaults allow you to configure some of the general settings which determine how Vembu BDR360 creates tickets in your Connectwise account.
- Enable the Connectwise Ticketing option using the toggle button.
- The category of events for which Vembu BDR360 should create tickets can be configured here.
- For example, it can be configured to create tickets only when something (example a backup) fails and not when something succeeds.

- The Default service board here refers to the service board in your Connectwise account to which Vembu BDR360 Server creates a ticket when more specific settings are not configured for a case under Connectwise Company mapping (described later in the document).
It is mandatory to select a default service board in ticketing defaults option. |
Billing Plan
To create a new bill plan, enable the Connectwise Billing option.
- Click the Add Plan button to create a new billing plan based on the agreement created.

- Enter the plan name, this is a reference used within Vembu BDR360 Server.
- Enter the agreement name (same name as entered in Connectwise Manage Agreement).
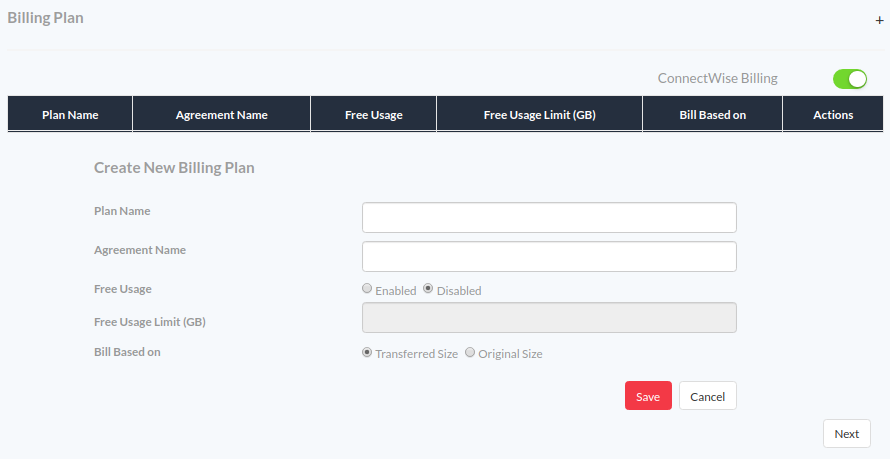
- We can enable the free usage option for customers, which is by default disabled. The free usage feature can be provided by mentioning the data cap (storage size in GB) and you won't be charged for a specified size limit. Once the limit exceeds, you will be charged.
Example: If you have been provided free usage limit up to 30 GB and consume 100 GB of data then you will be charged for the additional 70 GB.
- Customer bill can be generated based on transferred size (Compressed size of backups) or original size, use the radio buttons to select the options.
- On providing all required details, hit Save button and click Next to proceed with Connectwise Company Mapping.
Connectwise Company Mapping
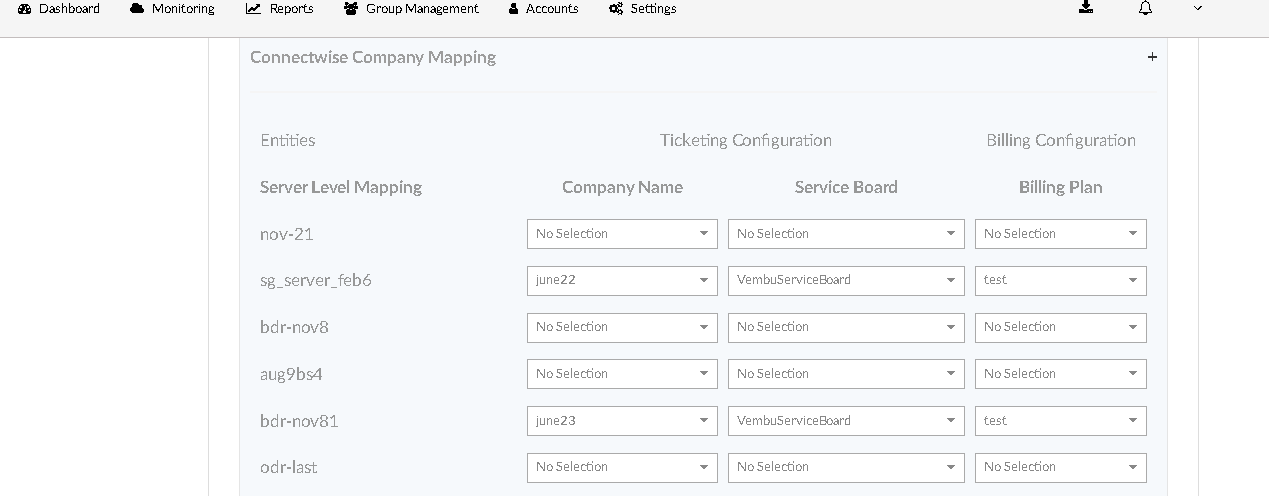
Connectwise company mapping allows you to map Vembu BDR Backup and Offsite DR Servers or Groups created under them to Connectwise entities, thereby ensuring that ticketing and billing are done as required.
Ticketing Configuration
This section allows configuring the Connectwise company and service board under which tickets should be created for events that occur under a server or group.
If the configuration is done for a server, the ability to configure for the groups under them is automatically disabled in the user interface. The disabling is also done for vice-versa cases. |
- By not selecting the company name for an entity (say a server), ticket creation can be disabled for that entity. Hence it is mandatory to select company names for those entities you need ticketing for.
- However, it is not mandatory to select a service board for all entities. If for an entity company name is selected but the service board is not selected, then tickets will be created under the selected Connectwise company, but under default service board (configured under ticketing defaults).
- Select the Connectwise company and service board using the drop-down list to which the tickets have to be sent. You can use the drop-down list or directly type the name of the company and service board respectively in the search bar.
- You can map the Connectwise company and service board either with the server level entities or group level entities.
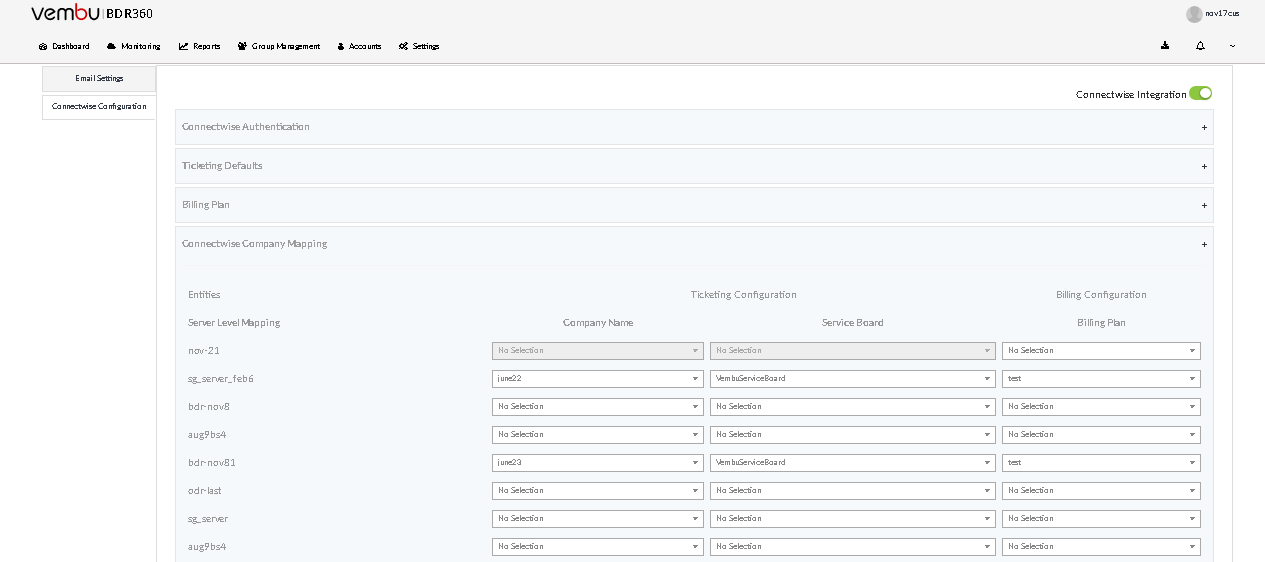
- Once mapped with the server, the groups under the same server cannot be mapped with the service board and vice versa. If the company is chosen and none of the service board is selected, the tickets will be sent to the default service board [Default service board is chosen under Ticketing defaults settings].
Billing Configuration
This section allows configuring a billing plan for a server or group according to which the bills are to be generated in your Connectwise account.
The billing plan specifies the Connectwise agreement which indirectly specifies company, product, and unit price of the billing process. As result bills are generated under respective companies. |
- Select the Connectwise company name and billing plan of your choice using the drop-down list. The search option is available for your convenience.
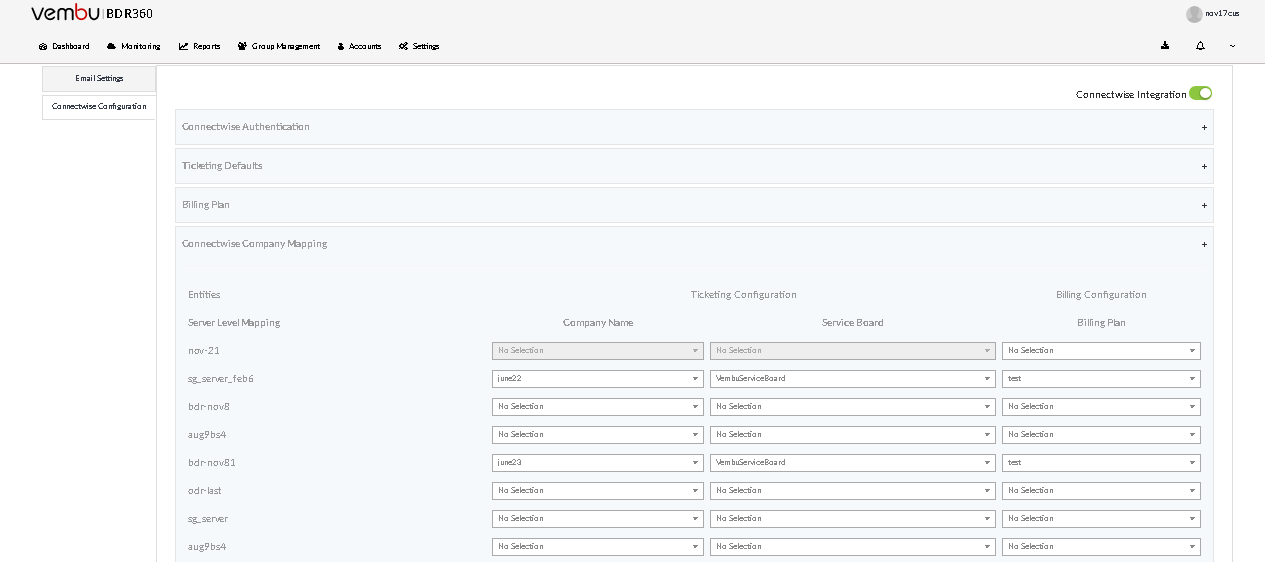
You can map a billing plan either to a server or to the groups under the server and not to both. i.e. once mapped for a server, the ability to map for groups under the server is disabled. The scenario is the same for vice-versa cases. |
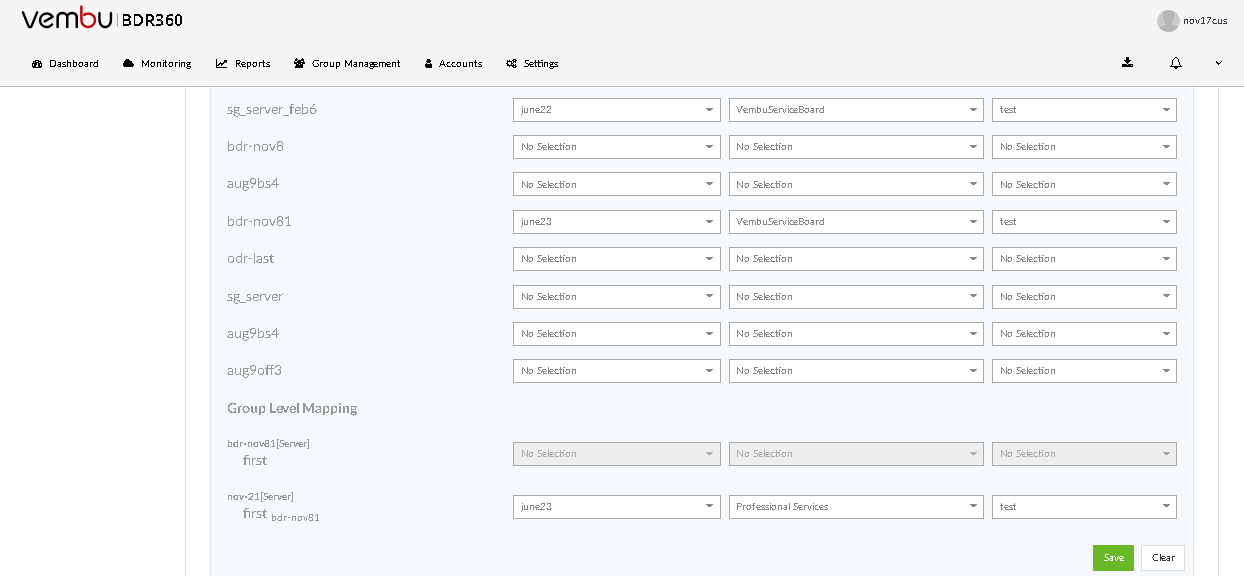
- Once mapped click the Save button, the ticketing and billing settings will be saved.
