MS Exchange Mailbox Backup
- Vembu NetworkBackup utilizes Exchange Mailbox plugin to backup users Mailbox at the folder level. Exchange Mailbox often contains critical data such as folders(contacts, E-mails, task, calendar) which play a pivotal part in managing communications within an organization.
- This backup type can be helpful in situations when you lose an individual data such as an E-mail, you need not restore the entire server for retrieving an individual E-mail. You can select the file you want during the restore process from the folder or subfolder of your backup data.
How does Exchange Mailbox plugin work?
- Exchange Mailbox plugin utilizes MAPI to backup your Mailbox data (folders and sub-folders). In the Exchange Mailbox backup process, your Mailbox data will be extracted from the Exchange Server into separate *.PST files, which will be dumped locally and then transferred to the backup server.
Note: Once the files are transferred successfully to the backup server, the locally dumped files are deleted automatically.
Supported Versions:
- Microsoft Exchange Mailbox 2013, 2010, 2007, 2003
Note:
- Usually, it is not enough to just backup MailBoxes alone. It is recommended that you always configure the Exchange Databases for backups. You can have additional Mailbox backups under the storage group so that you get additional granularity during restores wherein you can restore only a mailbox that is required.
- If you just configure only Mailbox backups and not configure the entire Exchange Databases group, then if your full Exchange Server crashes you will not be able to restore your Exchange Server at all.
Note: Exchange Mailbox cannot act as a stand-alone solution for restores performed after a disaster and MS Exchange Server restore is most helpful for such scenarios.
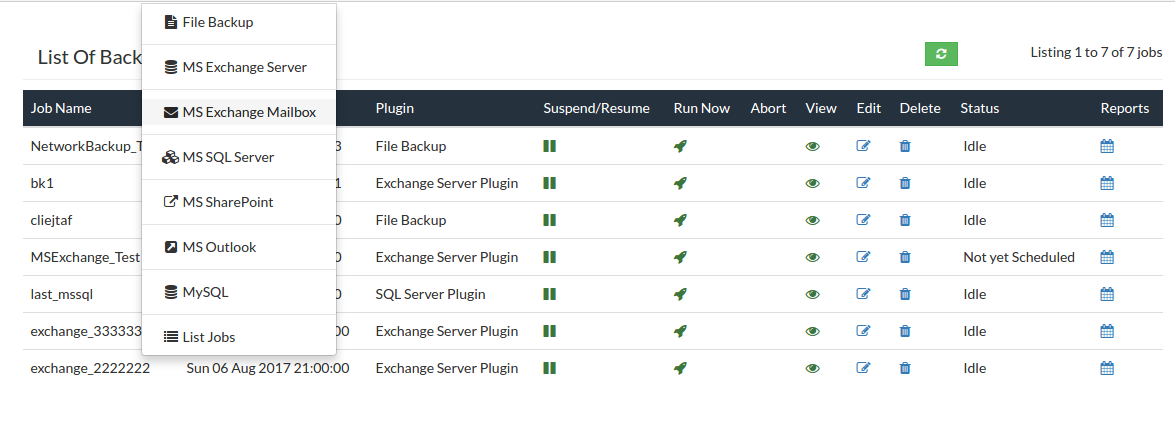
- From the Backup tab, select MS Exchange Mailbox option to begin your backup process.
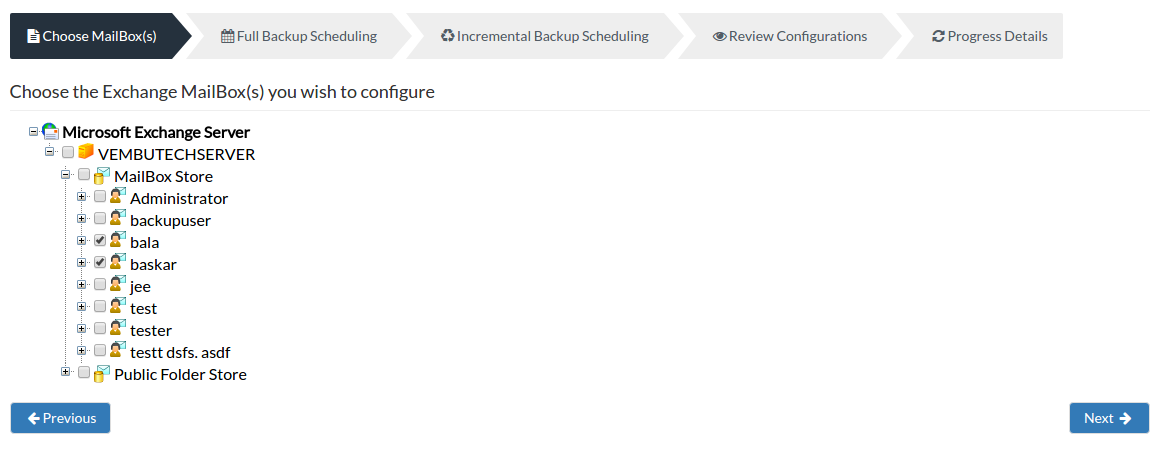
Step 1- Configuring Mailbox:
- In this page, the list of users and their corresponding Mailboxes, the folders and sub-folders that are available in the Exchange Server will be listed in a tree format. From the list, select the required Mailbox, folders or the sub-folders that are to be backed up. The mailboxes will be retrieved and listed with the help of MAPI plugin tool. Click Next to continue with the backup process.
Note: Vembu NetworkBackup should be running in the machine where Exchange Server is installed to create Exchange Mailbox backups. If multiple Exchange Servers are used, then Vembu NetworkBackup should be installed in all of them.
Note: Another important requirement is that the user account under which Vembu NetworkBackup is installed should have enough permissions to access the users Mailboxes. Please refer Granting Mailbox Rights document on creating a new user and granting the sufficient rights to access the Mailboxes.
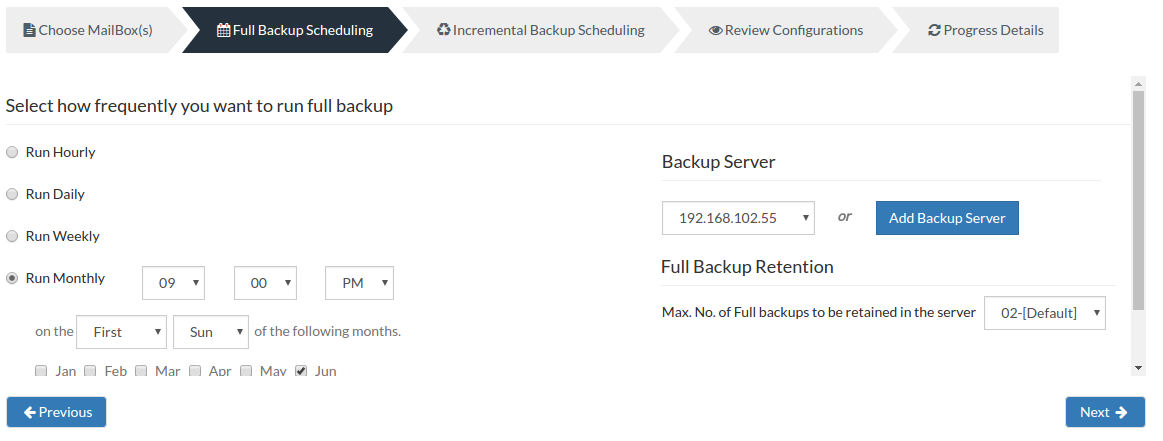
Step 2- Configure Full Backup Scheduling:
Need for configuring a Full Backup?
A Full backup is necessary because Vembu NetworkBackup will take a dump of your mailboxes folders locally and then transfer the data directly to your backup server. Configuring a full backup of your Exchange Mailbox data is a must and cannot be omitted. Once your full backup is completed, the log files that are backed up will be purged.
Server configuration:
Select Backup Server:
- This option lists and lets you add the backup servers to which the backup data are to be sent and stored. Once a backup server is configured and backup is initiated, it cannot be changed in the future. If there's a change in server name or IP address, you can use seed backup migration page.
Test Connectivity:
- Before choosing the backup server for scheduling backups, it is recommended to test the connectivity status of the server. This ensures that backup server is all set to receive backups from a particular client and there is no interruption in backup processing.
Add Backup Server:
- If a server you want to schedule backups is not configured, add the server using the Add Backup Server option.
- Make sure Vembu BDR is installed in the Backup Server else you will get the message: "The server is not listening on the port '32004'. Make sure Vembu BDR is running in the server and that you have specified the right port number. Ensure that your NAT/firewall at your server is configured to allow incoming TCP traffic on port."

Scheduling:
You can configure your backup schedules flexibly based on your requirement. You can choose from Hourly/Daily/Weekly/Monthly options for backup schedules.
- Run Hourly- This option will let you run a full backup in hourly time intervals. You can select the days in which the backup must run and the time-interval between backup schedules.
- Run Daily- This option lets you run a full backup once a day. Specify the time interval in which the full backups should run every day.
- Run Weekly- This option will run a full backup once in a week. Specify the day and time of your choice as to when to perform full backups in a week.
- Run Monthly- Run Monthly selection will run the full backup once a month. Specify the day, time and month of your choice for full backup schedules.
Note: Run Monthly is the recommended and default configuration.
Full Backup retention:
You can specify the count for the maximum number of full backups to be retained. For example, when you set the count as 2 for retaining the full backups in the backup server, only the latest 2 versions of the full backup will be retained. The default value for full backup retention is '2'. Once done with scheduling full backups, proceed to the configure Incremental Backup by selecting Next.
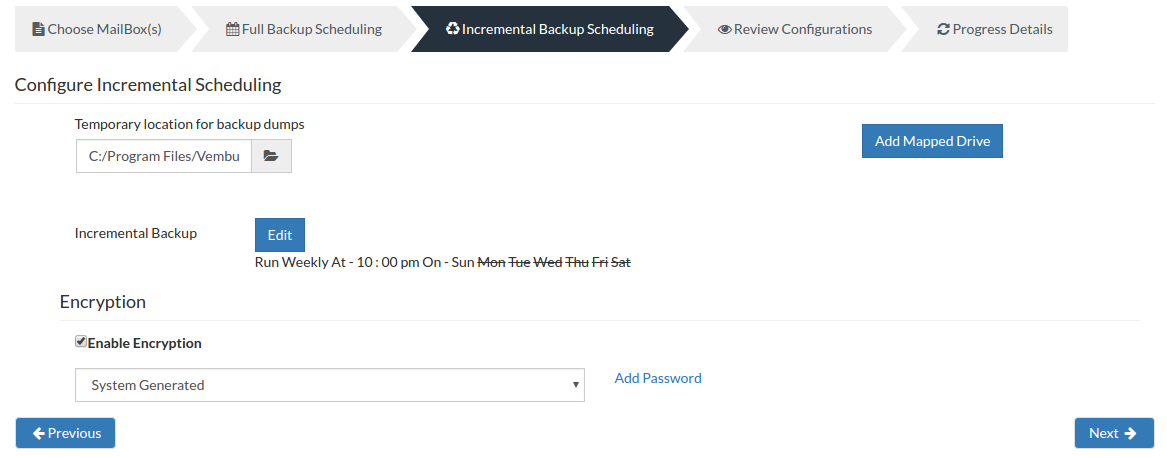
Step 3- Incremental Backup Scheduling:
Incremental Backup Scheduling:
- Vembu NetworkBackup will do an Incremental Backup dump of the user's Mailbox with respect to the previous full or incremental backup, whenever the Incremental log backup is scheduled. You can configure your incremental backup by selecting the Edit option and configure your schedule from the options mentioned below.
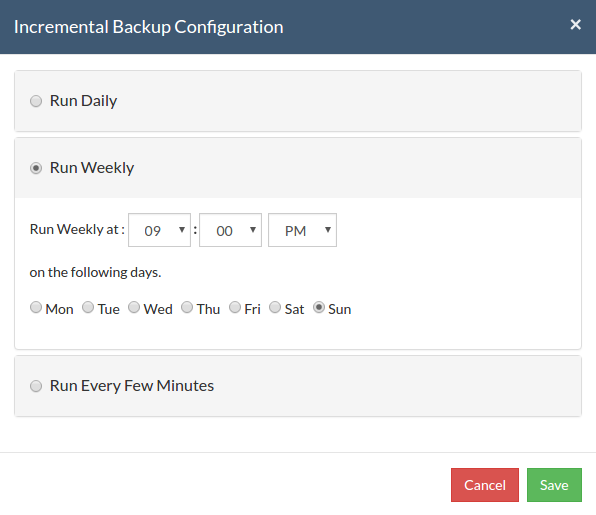
Run Daily - Choose the time at which your Exchange Mailbox data must be backed up daily. This will execute the backup every day during the time configured.
Run Weekly - Select the time and the day of the week in which the backup must run. Vembu NetworkBackup will run the backup in the configured time-period alone. You can select multiple days of the week if you wish to run the backup on multiple days of a week.
Run Every Few Minutes - Lets you decide the hour frequency at which backup schedule should be triggered. Decide the days in which the hourly schedules must be carried out. Once done click Save to save the configured schedule.
Note: If you configure Run Hourly for full backup, Run Weekly or Run Daily option for incremental backup then it will be invalid. Please select Run Every Few Minutes.
Note: The time selected for Run Monthly for Full Backup and Incremental Backup should not be the same.
Temporary location for backup dumps
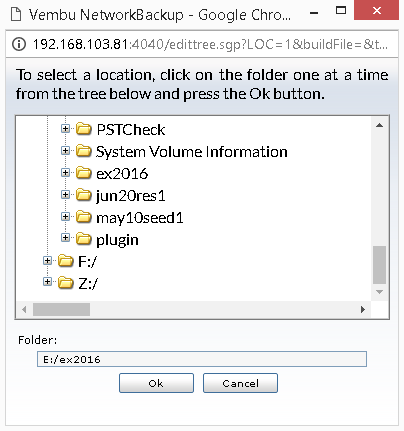
- Enter the location/directory path to which the Exchange Mailbox dumps has to be stored locally before uploading to the backup server. Please ensure that you have enough disk space in the configured temporary location (location where the backup dump is saved)
- The location you have configured for the backup dumps will be mentioned in the Folder tab. Click OK to finalize your dump location.
Note: Backup dumps stored in temporary location will be deleted once backup dumps are transferred successfully to the remote backup server.
Add Mapped Drive:
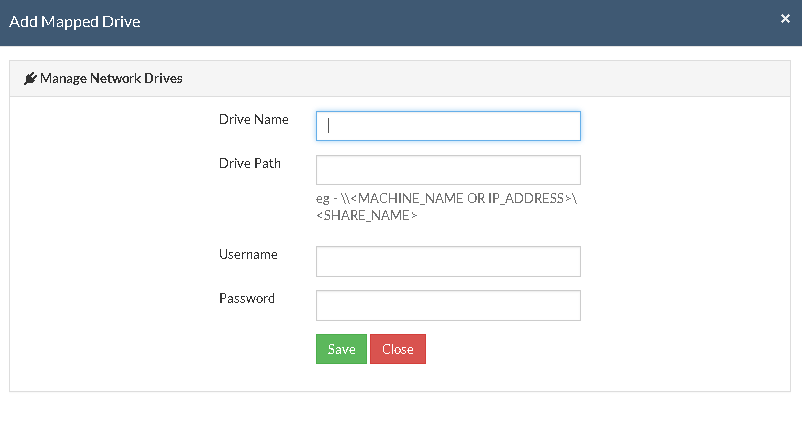
- There may be situations in which you may not have enough space to allocate for the dump process. In such cases, you can add a mapped drive by providing the drive name, drive path, username, and password. From there on the dumping process will happen to the configured drive only.
- The drive path must be in the following format : \\<MACHINE_NAME OR IP_ADDRESS>\<SHARE_NAME> make sure you give the correct details else you will get the status "Mapping the drive letter to the UNC path failed with the error: The network path was not found."
- Ensure you provide proper credentials, if not the message "Mapping the drive letter to the UNC path failed with the error: The specified network password is not correct" will appear. Click Save to complete the process.
Note: If the drive you have configured already exists or you have already mapped that drive to an UNC path, you will get the following message "C:/ drive already exists or mapped to an UNC path. Please choose a different drive letter.
Encryption Setting
Backups configured under Vembu NetworkBackup can be encrypted with a user-defined password which can be provided during backup configuration.
Steps to add Encryption Password:
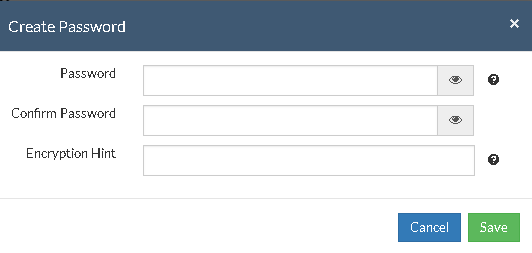
- In order to encrypt your backup, select Enable Encryption checkbox. You can either add your own password or encrypt the backup with a System Generated Password.
- To create a new password, click on Add Password. Provide password of your choice along with a password hint and save it
- Newly created password will be available in the drop-down list. Choose the password and click Next. All the added passwords will be listed in the drop-down box. With the help of the encryption hint, you can easily identify the required password. Click Save once you have provided the required details.
Note: By default, Vembu NetworkBackup uses the system-generated password to encrypt backups even if Encryption is disabled. You can opt to a custom password for extended data protection and you will be required to provide it during recovery. Opting to the custom password will disable integrity check from being performed automatically. It is recommended to perform Quick VM Recovery periodically to ensure data integrity.
Note: Password and its hint should not be the same to avoid security issues. Password should contain at least a character, a number and a special character [ ! @ # $ % ^ & * ] .Encryption hint should be at least 6 characters and not more than 25 characters. Encryption hints are unique and no two passwords can have the same encryption hint.
- Once done configuring the Encryption Password, Click Save.
Step 4- Review Configurations:
- The last step in the MS Exchange Mailbox backup configuration is to enter the backup schedule name. Vembu NetworkBackup supports creating multiple backup schedules each with its own configuration. The backup schedule name will uniquely identify the backup. While restoring your backup data, you need to choose the data to be restored using its schedule name.
- Review the configuration provided and enter an appropriate name for the backup schedule. Once done, click Save the Backup to initiate the backup progress as per schedule configured and it gets completed successfully.
Note: While providing a backup name, only [a-z][A-Z][0-9][ - _ ] characters are allowed in the backup name. If you have configured a backup schedule with this name already, enter a different name for this backup job.

Note: Run this backup immediately after saving this configuration will not be applicable for Run Hourly schedule.
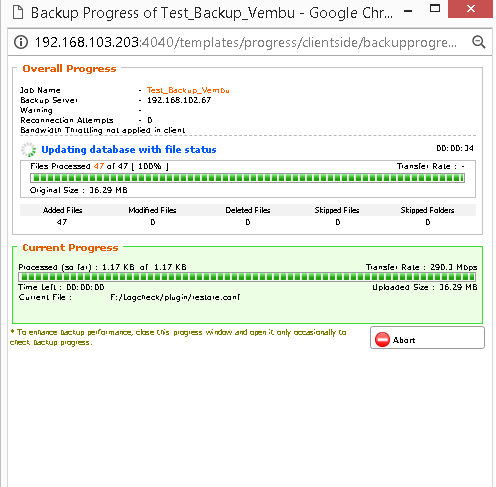
- You can verify the progress of your backup in the progress schedule window. In the List Jobs page, click on the arrow mark next to your backup schedule to open the backup progress window. The overall progress of your backup along with details such as :
- Job Name - Name of your backup job
- Backup Server - The backup server to which the backup is currently happening
- Warning - Warning if any
- Reconnection Attempts - The count of the number of times Vembu NetworkBackup client attempted to reconnect to the backup server
- Transfer Rate - Rate at which the backup data is transferred to your backup server. (Bytes,KB,MB,GB)
- Original Size of the file - The actual size of your backup file
- Added, Modified, Deleted, Skipped files and Folders count
- Time Left - Time remaining for your backup to complete.
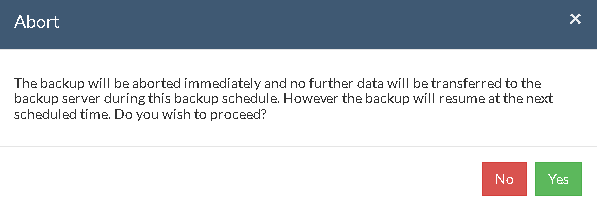
- You can abort your backup if not required from the Abort option available in the List Jobs page. You will get a pop up as shown below. Click Yes to Abort your backup.
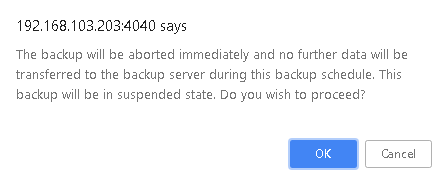
- You can Abort your backup from the backup progress window page also. Select the Abort (-) option in that window. You will be alerted with a pop-up as shown below. Click OK to abort your backup.
Note: To enhance your backup performance, close the progress window and open it only occasionally to check backup progress.